So I showed you what the undecorated cake looks like, now time to see the finishing steps.
First, find ribbon that matches your theme. For this one, I went with two different colors that matches the bedding picked out for the nursery.
It's hard to see from the picture, but I choose a blue bigger ribbon with an aqua smaller ribbon.
Then you take the ribbon and, using a glue gun, attached the ribbons to each layer of the diaper cake. I choose to use two ribbons on each layer, but this can be customized for each cake.
After the ribbons are attached, the fun begins!
Gather together the cake decorations and begin to plan out where you want things to go.
For this cake I had pacifiers, socks, newborn mittens, wrist rattles, spoons, teething toys, travel supplies, and washcloths.
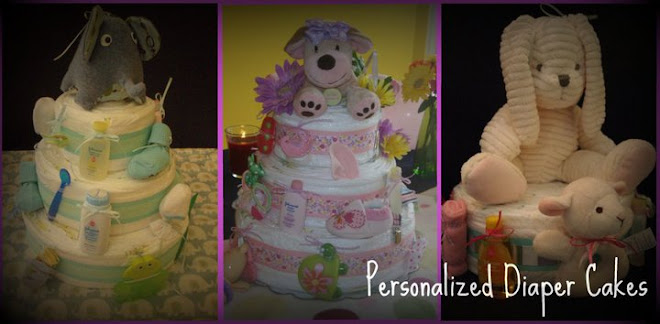
And finally, the finished product!
And there you have it, a finished diaper cake!!
Ingredients:
160 Newborn Pampers diapers
Johnson and Johnson's travel body wash
Johnson and Johnson's travel baby powder
Johnson and Johnson's travel shampoo
Travel Desitin
Baby socks 0-6 months
Newborn mittens
Newborn wrist rattles (2)
NUK pacifier (2)
Baby spoons (5)
Washcloths (2)
Frog teether toy
Pacifier clip
Stuffed elephant teething toy
Carter's elephant blanket
Stuffed elephant
Saturday, September 25, 2010
Friday, September 24, 2010
Cake Layers are Done!
So the layers are done! This three layer cake took approximately 160 newborn diapers.
The next step? Attaching the decorative ribbon around the center of each layer and then ribbon along the top and bottom of each layer to hold all of the cake goodies in place.
Wednesday, September 22, 2010
Progress of a Diaper Cake
So I started showing everyone how I make my diaper cakes. Now time to fill you in on it's progress!
The bottom layer is now complete. Hint: Once enough diapers are wrapped around each other, hold the roll of diapers between your knees so you have both hands to pull the diapers tight.
On to the middle layer (this cake will be three layers). This layer is made exactly the same as the first layer, taking time to even out the layer so that it will lay flat on top of the bottom layer. And it's up to you how big this layer is going to be. It should be smaller than your first layer, but not too small!
Finally, a sneak peak at the cake topper!!
More later!
Sunday, September 19, 2010
The Making Of... What I Use
So there's several different ways to create diaper cakes and all of them are effective in getting the "cake" feel.
Here's what I use to create custom diaper cakes.
Newborn diapers. The smaller size of these diapers create the perfect height for the cake layers
Pampers. I personally like the Pampers Swaddle Newborn diapers. What I like about these is that they are soft to the touch and also the outside is all white and creates a better "cake" feel.
Close up of the Pampers Newborn diaper. The yellow band at the top gives me a good guide for lining up the diapers and allows me to have an all white cake.
As I said, there's several ways to put together a diaper cake. This is how I create them, starting with one and then creating a continuous roll of diapers, all held together with first aid tape.
What is needed to start the process. Newborn diapers and First Aid tape
Johnson and Johnson First Aid tape. This is used to hold the diapers together, and while the tape will be on the diapers, all diapers are still usable once the tape is removed
The rolling of the diapers. It's one continuous roll, creating the cake "layers"
Friday, September 17, 2010
Diaper Cake Examples
Very first diaper cake, November 2008. The couple was not finding out if they were having a boy or a girl, so I went with the nursery theme, ducks and frogs. In addition to the stuffed duck and frog, I include some grooming tools, travel size shampoo and powder, socks, and spoons, among other fun stuff. And to match their color scheme, green and yellow ribbon tied everything together.
Second diaper cake, June 2009. I went with a monkey theme after finding the adorable stuffed monkey. As for colors, I decided on brown (to match the monkey) and blue. Once the colors were picked, I found blue and brown goodies to display on the cake. I decorated with spoons, travel shampoo, lotion and powder, socks, slippers, sunglasses and pacifiers.
First four tier diaper cake. 2010. And my first girl cake! For this one, done as a surprise for the mom to be, I based the color scheme off of the nursery bedding. As for the stuffed animal, the mom to be loves giraffes, so it was only natural to pick a girl giraffe for the cake. Because of the size of the stuffed animal, I had to do something a little different, and had the giraffe off to the side of the cake. In order to have everything fit together, fake flowers were added to the cake, food for the giraffe! Another new aspect I added to this diaper cake was a matching blanket which I placed under the cake. The blanket also had a giraffe on it, matching the color scheme as well. Included on this cake: shoes, teething toys, spoons, socks, a small toy, travel size powder, shampoo and lotion, and pacifiers.
Girl diaper cake, August 2010. Again, the theme for this cake was based off of the nursery bedding and the stuffed animal on top was picked because the parents to be have two dogs, very similar to the stuffed dog. I again chose a blanket that matched the nursery bedding to place under the cake. In addition, I added a ballerina toy (mom to be danced growing up and in high school and college), bows and headbands, shoes, socks (placed on the puppy), newborn mittens, pacifiers and pacifier clips, travel size products, bath squirt toys, spoons, teething toys, and a few flowers to fill in any gaps.
So that's just a few examples of what I've done. Currently working on another one, and as I'm putting it together, I'm going to be documenting the process. Be sure to check back soon!
Second diaper cake, June 2009. I went with a monkey theme after finding the adorable stuffed monkey. As for colors, I decided on brown (to match the monkey) and blue. Once the colors were picked, I found blue and brown goodies to display on the cake. I decorated with spoons, travel shampoo, lotion and powder, socks, slippers, sunglasses and pacifiers.
First four tier diaper cake. 2010. And my first girl cake! For this one, done as a surprise for the mom to be, I based the color scheme off of the nursery bedding. As for the stuffed animal, the mom to be loves giraffes, so it was only natural to pick a girl giraffe for the cake. Because of the size of the stuffed animal, I had to do something a little different, and had the giraffe off to the side of the cake. In order to have everything fit together, fake flowers were added to the cake, food for the giraffe! Another new aspect I added to this diaper cake was a matching blanket which I placed under the cake. The blanket also had a giraffe on it, matching the color scheme as well. Included on this cake: shoes, teething toys, spoons, socks, a small toy, travel size powder, shampoo and lotion, and pacifiers.
Girl diaper cake, August 2010. Again, the theme for this cake was based off of the nursery bedding and the stuffed animal on top was picked because the parents to be have two dogs, very similar to the stuffed dog. I again chose a blanket that matched the nursery bedding to place under the cake. In addition, I added a ballerina toy (mom to be danced growing up and in high school and college), bows and headbands, shoes, socks (placed on the puppy), newborn mittens, pacifiers and pacifier clips, travel size products, bath squirt toys, spoons, teething toys, and a few flowers to fill in any gaps.
So that's just a few examples of what I've done. Currently working on another one, and as I'm putting it together, I'm going to be documenting the process. Be sure to check back soon!
Thursday, September 16, 2010
What Is A Diaper Cake?
Diaper cakes have become a popular decoration/gift idea for baby showers. Made completely out of newborn diapers (or any size diapers for that matter) and covered with useful items for a new mom and baby, diaper cakes are practical gift ideas, as well as conversation pieces. And once the baby is born, all mom and dad need to do is undo the cake, layer by layer, and use the diapers!
I've seen two different ways to construct a diaper cake, the way I've done them, continuously rolling diapers together to form the cake layers or the second way, by rolling each individual diaper and then wrapping the individually rolled diapers around a core.
Each diaper cake starts with a theme making each one a personalized gift. Themes can be based off of anything, the nursery, the bedding the expecting parents picked for their baby, the shower theme, anything is possible!
Subscribe to:
Posts (Atom)